
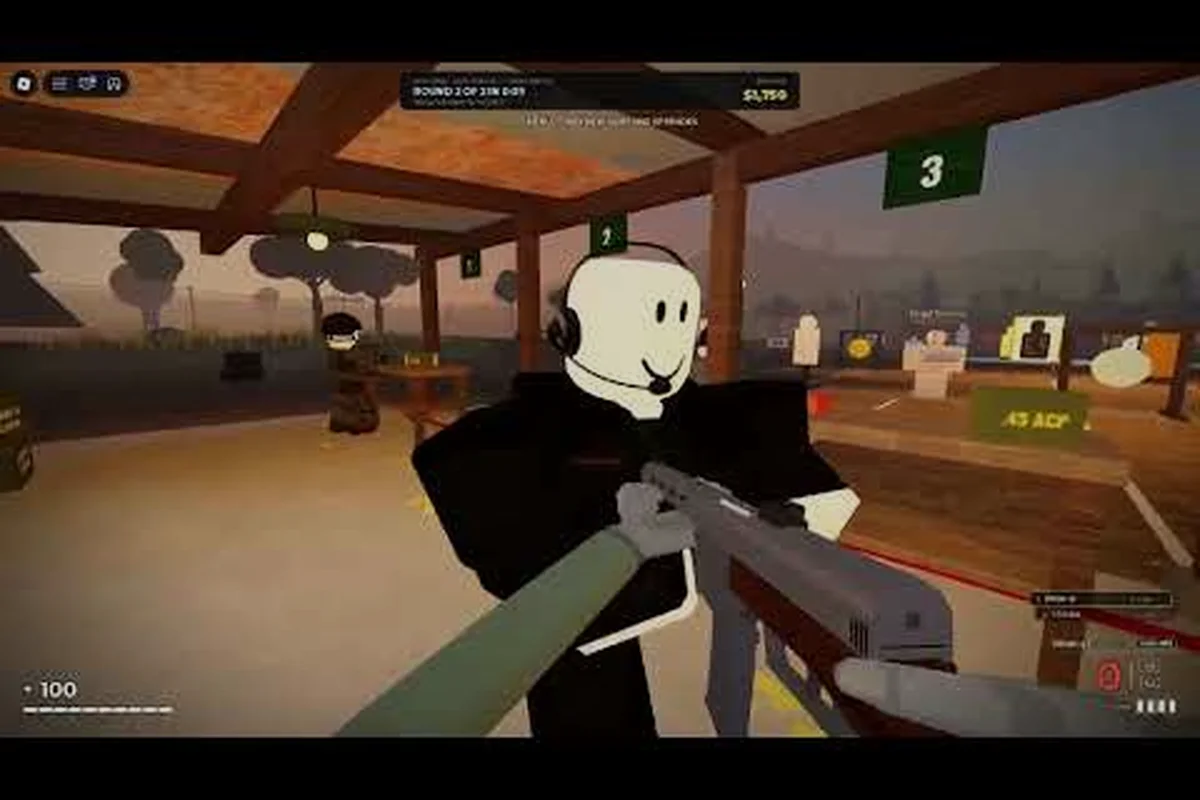
REALISTIC HOME DEFENSE drops you into a house under siege with nothing but a flashlight, a limited budget, and a few seconds to decide where to stand. This guide part 1 covers the realistic home defense basics you need before your first round: how the loop actually works, which controls matter most, and a simple defensive setup that survives the opening waves.
If you have loaded in once and died within the first minute, you are not alone — the game punishes wandering. The good news is that the opening round is learnable in a single sitting once you understand the three things that kill new players: bad sightlines, wasted budget, and panic movement.
What the REALISTIC HOME DEFENSE Basics Actually Cover
The core loop is simple on paper: barricade, watch, react. In practice, the game asks you to manage a budget, place defenses with real physical coverage, and keep your character calm enough to aim. Understanding this loop is the foundation of any realistic home defense walkthrough, because every later mechanic — better weapons, tougher barricades, larger houses — builds on the same three decisions.
Here is what the first round actually demands from you: a defensible entry point chosen before the first intruder spawns, since the opening wave arrives on a fixed timer that gives you roughly one minute of prep — enough for two barricade placements and one weapon purchase, not enough to experiment. Spend that minute reading the floor plan: identify the single doorway with the longest sightline from your holding position, barricade the secondary window with the cheapest board so it buys you three to four seconds of break time, and keep the remainder of your budget in reserve rather than dumping it into a shotgun you cannot afford to reload. The first round is a calibration test — it tells you which approach vector the AI favors on that map layout, and that information is worth more than any single purchase.
-
A budget you cannot refund — every purchase is permanent for that round, so a bad buy costs you a window.
-
Physical sightlines — walls block vision for intruders and for you, so placement matters more than raw stats.
-
Stamina and movement — sprinting drains you fast, and a tired character cannot hold a doorway.
-
Sound cues — footsteps and breaking glass tell you where pressure is building before you see anyone.
A useful way to think about the opening minutes is that you are not playing a shooter, you are playing a resource puzzle with a gun attached. Players who treat the first round as a test of aim usually lose; players who treat it as a placement problem usually survive.
The Three Phases of a Round
Every round follows the same rhythm — Prep, First contact, and Escalation — and knowing the phases lets you plan instead of react. Treat each phase as a distinct job with its own clock: Prep is your 30–45 second buy-and-place window, First contact is 60–90 seconds of light pressure on the outer entries where you hold position and listen rather than chase, and Escalation eats the rest of the round as multiple entries and heavier pushes force you to rotate, repair, and conserve ammo. Mapping your budget and barricade placement to those three windows up front means the escalation spike never catches you mid-shop.
| Phase | Duration (approx.) | What Happens | Your Job |
|---|---|---|---|
| Prep | 30–45 seconds | Buy and place defenses | Spend budget, lock sightlines |
| First contact | 60–90 seconds | Light pressure on outer entries | Hold position, listen |
| Escalation | Rest of round | Multiple entries, heavier pushes | Rotate, repair, conserve ammo |
The prep phase is where rounds are won. If you spend all 30 seconds shopping and none of it checking where your barricades actually sit, the first contact phase will feel random even though it is not. Walk your own house during prep — literally trace the path an intruder would take and ask whether you can see them before they see you.
Why the First Round Feels Unfair
Community reports consistently describe the same early experience: the first round feels like the game is cheating. It is not. The opening round uses a fixed pressure curve, which means it is identical for every player, and it is designed to punish two specific habits — standing in the open and buying offense before defense.
Once you accept that the first round is a scripted lesson rather than a fair fight, the fix becomes obvious. Buy one barricade before you buy anything else, stand behind it, and let the intruders come to you. That single change flips most first-round losses into wins, and it is the same principle that carries into the new player guide when you start expanding your setup.
Setting Up Controls and Settings Before You Defend
Your control scheme decides whether you can react in time, and the default layout is workable but not optimal. The single most valuable change is separating your interact key from your fire key so you never accidentally open a door while trying to shoot through it. A dedicated realistic home defense tutorial on inputs is worth ten minutes of your time, and the full control tutorial breaks down keybinds, sensitivity, and mobile layouts in detail.
Start with these adjustments: before you touch a single keybind, spend two minutes in a low-stakes interior — the tutorial house or an empty early map — and deliberately test your current layout by piecing a corner while holding an angle. You are checking one thing: whether your aim hand and your interact hand ever fight over the same input. In realistic home defense, a single stray door open on a blind corner gives away your position and pulls defenders out of cover, so the cost of a bad bind is a lost hold, not just a fumbled animation. Work through the four changes below in order, then re-run that same corner test to confirm the fix holds under pressure.
-
Lower your look sensitivity by roughly 20% from default — tight interiors reward precision over flick speed.
-
Bind interact to a key your trigger finger never touches — this alone prevents most accidental door opens.
-
Enable any available audio cue emphasis — footsteps are your primary early-warning system.
-
Set your field of view slightly wider than default so doorways stay in frame while you hold an angle.
Recommended Keybind Priorities
| Action | Priority | Why It Matters |
|---|---|---|
| Interact | High | Prevents accidental door opens mid-fight |
| Reload | High | Must be reachable without leaving aim |
| Sprint | Medium | Useful for rotations, not for combat |
| Crouch | Medium | Lowers your profile behind cover |
| Flashlight | Low | Only needed in dark corners |
Sensitivity is the setting most players get wrong. High sensitivity feels responsive in an open field, but this game happens in hallways and doorways where a small overcorrection sends your crosshair into a wall. Drop it, play one round, and adjust by small increments rather than large jumps.
Audio Is a Real Mechanic
Treat sound as a tool, not background noise. Breaking glass, footsteps on stairs, and the click of a door handle all resolve directionally, which means you can pre-aim a doorway before anyone appears in it. Players who mute or ignore audio consistently report being surprised from behind, while players who lean on audio describe the game as readable.
If you play with headphones, keep game audio above any background music. The difference between hearing a window break on your left and not hearing it at all is usually the difference between a clean hold and a lost round.
REALISTIC HOME DEFENSE Walkthrough: Your First Defense Round
This section is the practical heart of the guide: a step-by-step first round you can copy exactly, and the realistic home defense walkthrough below assumes default difficulty and no prior purchases, so it works on a fresh save. That constraint matters because your starting budget only covers a single barricade and one reload's worth of ammunition — the round is deliberately tuned so that a second barricade or an unplanned weapon swap leaves you unable to repair after the first push. Treat the six steps as a fixed loadout check rather than suggestions: deviate on a fresh save and the escalation phase arrives with your entry still unfortified and your hold point exposed.
Follow the sequence in order and resist the urge to improvise on your first attempt. The six steps below are ordered deliberately: barricade placement gates your hold point, your hold point gates your retreat spacing, and your repair timing gates whether you survive the escalation phase. Skipping ahead — say, buying a second weapon before banking repair budget — breaks the chain, because a fresh save's starting funds can't cover both a reload and a mid-fight repair. Treat each step as a checkpoint you clear before the next, and run the realistic home defense walkthrough exactly as written until the first contact and escalation phases both resolve cleanly.
-
Spend your first budget on one barricade, placed on the entry closest to your starting position. Do not spread purchases across three doors.
-
Walk the interior and identify the one hallway where you can see two entries at once. That hallway is your hold point.
-
Stand two steps back from your barricade, not directly against it, so you have room to retreat and re-aim.
-
Wait through the first contact phase without leaving your position. Let the barricade absorb the first push.
-
Repair or replace only after the wave clears, never mid-fight, because standing still during a repair is a death sentence.
-
Bank leftover budget for the escalation phase instead of buying a second weapon you cannot afford to reload.
A Simple Placement Table
| Entry Type | Recommended Defense | Reason |
|---|---|---|
| Front door | Single barricade | Highest traffic, easiest to watch |
| Side window | Furniture block | Cheap, slows entry, no repair cost |
| Back door | Leave open, watch it | Forces intruders into your sightline |
| Stairs | Nothing | Chokepoint already works in your favor |
The counterintuitive entry on that table is the back door. Leaving one path open sounds reckless, but a sealed house forces intruders to break through your strongest point, while an open path funnels them exactly where you are already aiming. Experienced players call this a bait lane, and it is one of the realistic home defense basics that separates a calm defender from a panicked one.
What to Do When the Barricade Breaks
It will break, and that is fine. The correct response is to fall back one room rather than stand and fight at the breach. Falling back buys you three to five seconds, which is enough to reload, re-aim, and let the intruder walk into your new sightline. Standing at a broken barricade is the most common cause of first-round deaths reported by players.
Keep a mental note of your fallback room during prep. If you have not chosen one before the round starts, you will choose badly under pressure. The fallback room should be a hard corner with a single entry point, ideally a bedroom or bathroom where the doorway creates a fatal funnel that forces the intruder into your pre-aimed sightline. Pair it with a secondary exit such as a window or connecting hallway so you are never trapped if the intruder breaches from an unexpected angle. During the prep phase, walk the route from your primary barricade to the fallback room twice and note the exact distance, since crossing more than one open doorway exposes you to a flank you cannot cover alone.
Reading Pressure and Rotating Without Panic
Once you survive the opening, the round shifts from placement to decision-making. Pressure builds in patterns: light probing on outer entries, then a heavier push on whichever entry you have ignored. Learning to read that pattern is the difference between a defender who reacts and a defender who anticipates.
Watch for these signals: each one maps to a decision you can rehearse before the round starts. On outer-entry probing, count the interval between contacts — a steady rhythm usually means the game is still gathering information, while a rhythm that accelerates signals an imminent commit. When one side goes quiet after sustained noise, treat the silence as a repositioning window and pre-aim the fallback route rather than the contested entry. If two sounds land within the same beat, your tiebreaker is distance to cover, not which side is louder; committing to the shorter fallback route preserves your rotation options if the first read is wrong.
-
Repeated noise on one side usually means the game is testing that entry — do not abandon it.
-
Silence after noise often precedes a push, because intruders reposition before committing.
-
Two simultaneous sounds mean you must choose a side; pick the one with the shorter fallback route.
Rotation Decision Table
| Situation | Correct Move | Wrong Move |
|---|---|---|
| Barricade at 50% health | Pre-aim, hold | Leave to repair |
| Noise on two entries | Hold the tighter hallway | Sprint between both |
| Ammo below one magazine | Fall back, reload | Push forward |
| Barricade destroyed | Retreat one room | Stand and fight |
The theme across every row is the same: give up space instead of giving up position. Space is recoverable; a bad angle is not. This principle scales directly into the tactics guide once you are comfortable with single-entry holds and start managing multiple lanes at once.
Conserving Ammo and Stamina
Two resources quietly decide most rounds. Ammo runs out faster than new players expect, and stamina regenerates slower than it drains. The practical rule is to fire only when an intruder is inside your sightline and moving toward you, and to sprint only when rotating between holds.
A defender who fires at every sound ends the round with an empty weapon and a broken barricade. A defender who waits ends the round with both intact. Patience is not passive here — it is the mechanic. Consider the stamina math: a full sprint between holds can drain most of the bar, and that same bar is what lets you steady your aim and absorb a shove when an intruder finally breaches the doorway. A player who mag-dumps through a closed door at a footstep trades a full magazine and a chunk of stamina for nothing, then has to hold the next corner winded and empty. The player who tracks the sound, holds the angle, and fires only when the silhouette crosses the sightline keeps the magazine topped off and the stamina bar green — the exact state you need for the second and third intruder that always follow the first.
Common First-Round Mistakes and How to Fix Them
Most losses trace back to a short list of habits, and each one has a direct fix. In the early rounds, the failure pattern is almost always the same: players spend their starting budget on a weapon before securing a barricade, then get caught mid-repair when the next wave spawns. Reviewing this list before your next attempt is faster than learning each lesson the hard way, and it keeps your first-round economy intact instead of forcing a rebuild from zero.
-
Buying a weapon before a barricade — fix by locking your first purchase to defense every round.
-
Standing in doorways — fix by holding two steps back and to one side.
-
Repairing during contact — fix by treating repairs as between-wave actions only.
-
Ignoring audio — fix by playing one round with headphones and no music.
-
Hoarding budget all round — fix by spending leftover funds on the escalation phase.
Mistake-to-Fix Reference
| Mistake | Symptom | Fix |
|---|---|---|
| Over-extending | Dying in the open | Hold from cover, retreat early |
| Over-buying | No funds mid-round | One purchase per phase |
| Over-rotating | Constant sprinting | Pick one hold, defend it |
| Under-listening | Surprised from behind | Raise audio, lower music |
The pattern behind all four rows is overcorrection. New players either do too much or too little, and the stable middle is a single well-defended position that you leave only when it fails. That balance is what the survival guide builds on for longer sessions, and it is worth internalizing now rather than after ten losses.
Raw no-commentary footage is genuinely useful for learning pacing, and the first gameplay entry in totogngngnt's series shows how a calm defender moves compared to a panicked one. Watch how little the player sprints, and how often they simply wait.
Frequently Asked Questions
What should I buy first in REALISTIC HOME DEFENSE?
Buy a single barricade before anything else. Defense purchases protect your budget by preventing early breaches, while an early weapon purchase leaves your entries open and forces expensive repairs. One barricade on your highest-traffic entry is enough to survive the first contact phase on default difficulty.
How many rounds does the first defense take?
The opening round runs roughly three to four minutes depending on how quickly you clear pressure. Prep takes about 30 to 45 seconds, first contact lasts 60 to 90 seconds, and the escalation phase fills the remainder. Surviving the escalation phase completes the round and unlocks your next budget tier.
Does lowering sensitivity really help indoors?
Yes. Tight hallways and doorways punish overcorrection, and a lower sensitivity keeps your crosshair on the frame instead of the wall. Most players settle around 20% below default. Adjust in small increments over two or three rounds rather than making one large change.
Can I skip the tutorial and jump into a round?
You can, but the tutorial teaches the budget and placement systems that the first round assumes you already know. Skipping it usually produces a fast loss because you will not know which entries are pre-barricaded. Ten minutes in the tutorial saves several failed attempts.
Why do intruders keep coming from the same side?
The pressure curve favors one side at a time, so repeated noise on one entry is intentional. Hold that side with your barricade and let the opposite entry stay lightly watched. Abandoning the pressured side to check the quiet one is the most common rotation error.
Part 1 of this realistic home defense guide gives you the foundation: understand the three-phase loop, fix your controls and sensitivity, place one barricade on your busiest entry, and hold a fallback room instead of standing at the breach. Master those basics and the first round stops feeling unfair — it starts feeling like a puzzle you already know how to solve.